If the importance of thorough deal preparation is neglected, it can negatively affect complex deals.
In fact, poor deal preparation may cause an inefficient due diligence process, deficiency in strategic planning, and a lack of effective communication, which can put business transactions at risk.
While deal preparation is a major step that can take between 18-24 months, setting up a VDR takes only between 15-30 minutes to complete.
As such, setting up a virtual data room quickly and on time is the minimum step organizations may take to prepare for a business transaction, thus maximizing the potential deal outcome.
Selecting the best provider
Before the virtual data room set up, it is essential to choose the right virtual data room software.
| Virtual data rooms are secure online repositories frequently used in the due diligence process and other business transactions. They offer centralized document storage for sensitive documents collection, organization, and exchange. |
In this regard, the cost-to-quality ratio is the most important factor to consider. Therefore, when comparing providers, make sure to include things like pricing models, flexibility, the availability of free trials and demos, and the storage limits per plan.
To save time and effort, here’s an overview of the best virtual data room providers. However, it lacks specific pricing details because most virtual data rooms don’t disclose plan details publicly. Prospective customers are encouraged to contact a sales representative for a customized quote.
| Virtual data room provider | Ideals | Merrill Datasite | Firmex | Intralinks | Onehub |
| Pricing type | Flat fee | Flat fee | Flat fee | Flat fee | Flat fee |
| Packages offered | Pro Business Enterprise | Custom | Custom | Custom | Standard Advanced Data Room Unlimited |
| Free demo | Yes | Yes | Yes | Yes | Yes |
| Free trial | 30 days | Yes | 14 days | No | 14 days |
| Storage range | 10 GB → 1 TB | 0.5 → Unlimited | 1 GB → Unlimited | 0.5 → 20 GB | 1 TB → Unlimited |
| User limit | 5 admins → unlimited admins and users | N/A | 10 users → unlimited users | Unlimited admins, guests, and users | 200 users → unlimited admins and users |
| Price range | Quote-based | Quote-based | From $2500* requires a 3-month minimum | $900 | $12.50 → $575 |
In addition, it is critical to evaluate whether data room services have a proper feature set. It is essential to check and verify if a virtual data room offers:
- Document and user management. From a user management page, you set access levels for individual contributors or a group of users within the organization. From the file permissions tab, you can establish access levels for various groups, from view-only to limit-free file permissions.
- File upload and organization. Uploading files should be easy. Make sure you can bulk upload documents, upload a ready-made document index, or add files by drag-and-drop.
- Multi-format document viewer. While most providers offer conversion to PDF files to view documents online, it is great to have the ability to view other files as well, including financial documents with formulas in Excel and MS Office files.
- Security settings. Highly confidential files must be securely protected. Virtual data rooms feature such advanced security settings as two-factor authentication, end-to-end encryption, built-in redaction, digital watermarks, and many other functionalities ensuring top-level protection.
- Project management. For managing project processes and communications, data rooms offer tools like advanced Q&A modules with built-in communication functionalities. Additionally, data rooms allow document annotations and comments for quick discussions of certain files.
- Customer support options. A reputable virtual data room provider should offer multi-lingual support available via live chat, email, and phone. A team of project managers should also be made available, as these people offer expert assistance with virtual data room setup.
- Reporting. Virtual data rooms should also offer insightful analytic opportunities. With detailed activity reporting and access logs, data room admins can track interactions with documents and folders.
Now, let’s move forward and detail how to set up a data room quickly and effectively.
Setup the NDA agreement
Setting up a non-disclosure agreement (NDA) is an important step when creating a virtual data room (VDR). To grant access rights to the virtual data room, you should have the option to require all users to sign a confidentiality agreement.
For example, when a user enters the data room for the first time, they will be presented with the NDA. If they agree to the terms, their acceptance will be recorded in the activity log. However, if they decline the agreement, they will not be permitted to use the virtual data room. This creates a level of security you cannot go without when working with highly confidential documents.
That said, here are the steps for setting up an NDA agreement in a VDR:
- Create the NDA agreement. You can either create your own NDA agreement or use a template offered by the virtual data room. While there are many templates available online that you can use as a starting point, it is important to get the assistance of your legal team.
- Include relevant information. Make sure the data room NDA agreement includes all relevant information, such as the parties involved, the scope of the agreement, the duration of the agreement, and any exclusions or exceptions.
- Upload the NDA agreement to the VDR. Once the NDA agreement has been created, upload it to the data room. This can be done using the document upload feature in the VDR software. However, many data room providers offer built-in NDA templates which can be simply modified to meet your needs.
- Renew or terminate the agreement. Depending on the duration of the NDA agreement, you may need to renew or terminate it at the appropriate time. Make sure to communicate any changes to the NDA agreement to all parties involved.
By following these steps, you can set up an NDA agreement in a virtual data room to help ensure that sensitive information is well-protected and fully confidential. Remember that the non-disclosure agreement (NDA) should be fully customizable, offering maximum flexibility to meet your specific requirements.
Create an admin account
Setting up an admin account in the virtual data room (VDR) is important to ensure that it’s properly managed and controlled. Here are the steps you can follow to set up an admin account in a data room:
- Choose an administrator. The first step is to choose an administrator who will be responsible for managing the VDR. This could be someone within your organization or a third-party provider.
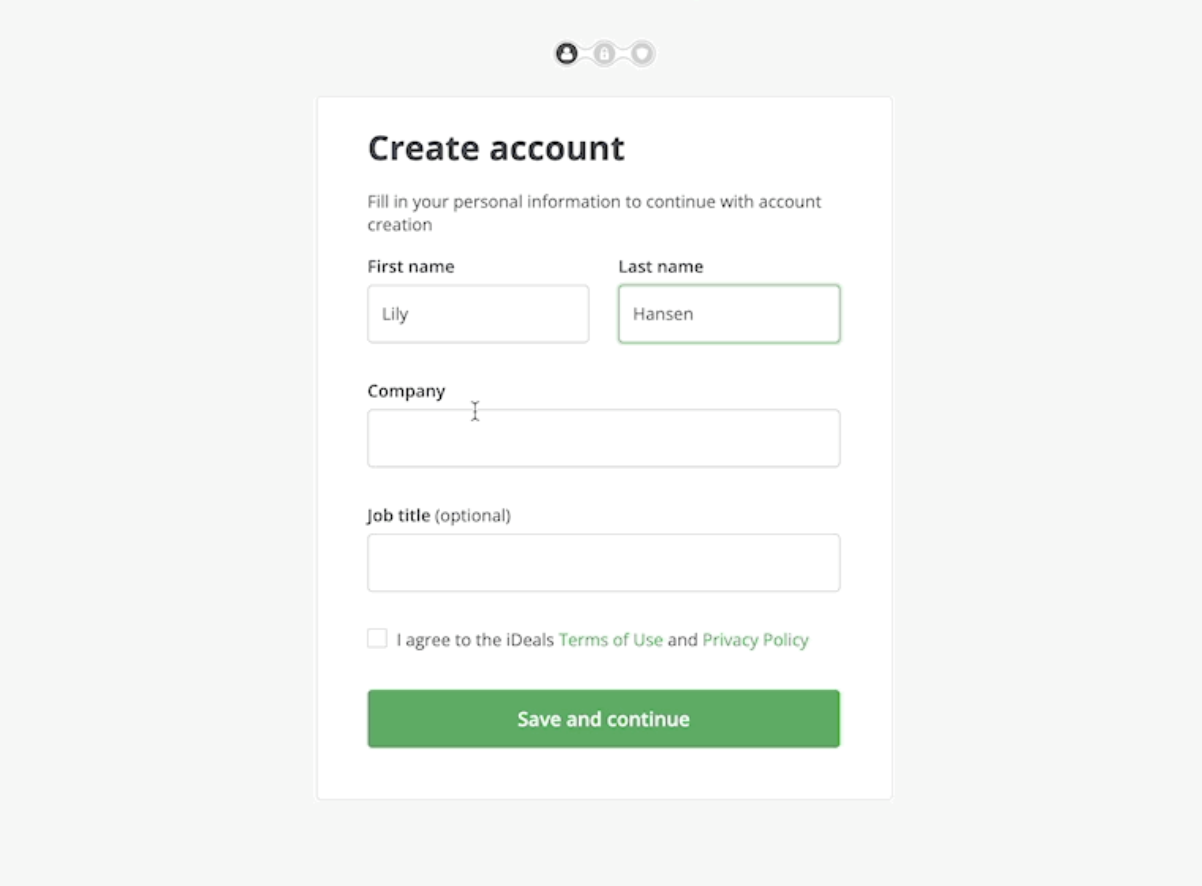
- Accept NDA terms and Privacy Policy. To proceed with the registration process, you need to provide your personal information and accept the NDA terms and Privacy Policy.
- Create a strong password or passphrase and choose a security question. Once you’ve come up with a password or a passphrase, you’ll be asked to generate a security question. Your answer to this question will be required in case you need to change your password or phone number.

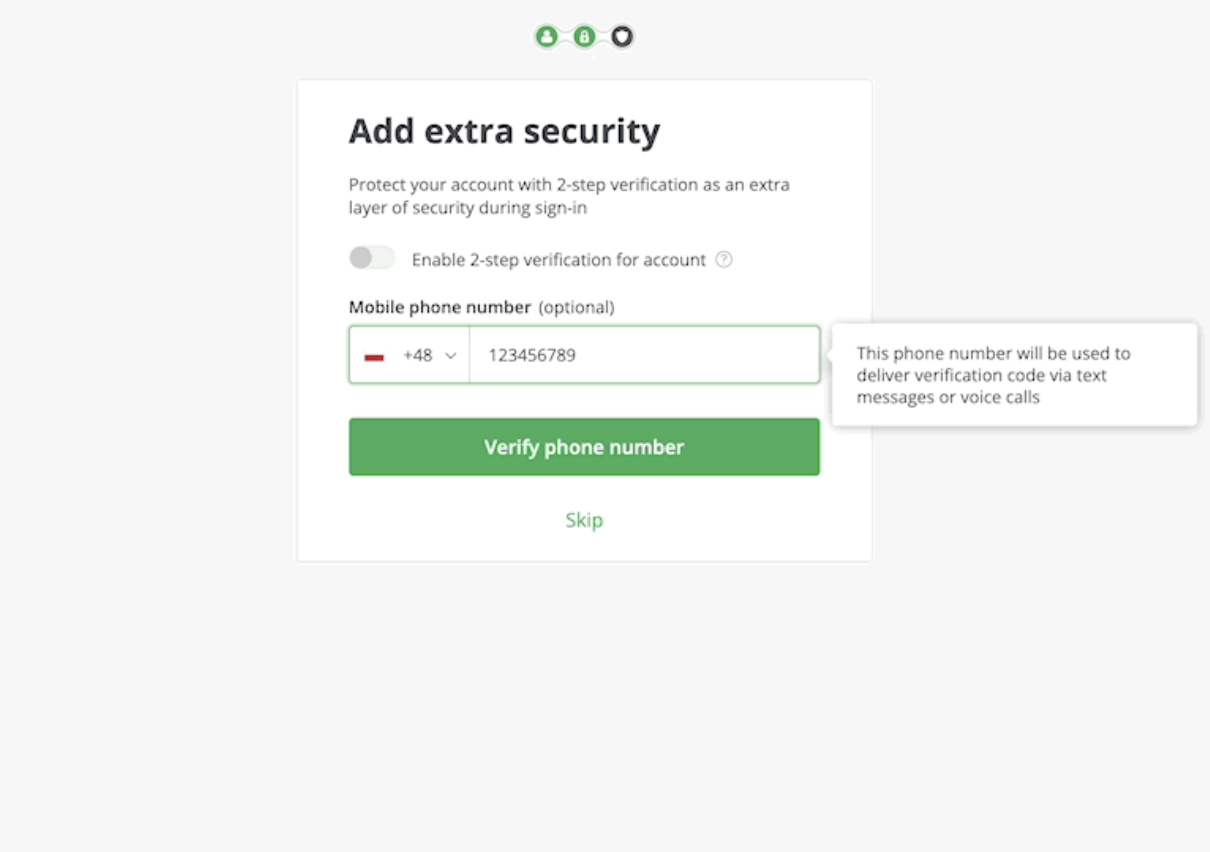
- Opt for additional security measures. Optionally, you can set up additional security preferences, such as providing and verifying your mobile phone number. Doing this will ensure you can retrieve access to your account or confirm any password changes through a one-time code sent to your phone. Alternatively, you can answer a security question as well.

- Set up multi-factor authentication. You can also enable 2-step verification to add an extra layer of security to your data room account to help prevent unauthorized access.
- Complete admin account setup. Once all the above steps are complete and the administrator is appointed, you can start using the VDR software’s administrative console for all the remaining setup steps.
Structure the VDR
Structuring a virtual data room (VDR) efficiently is crucial to ensure that users can easily access and navigate through the documents and information stored in the VDR.
Here are some clear steps to follow to structure a data room efficiently:
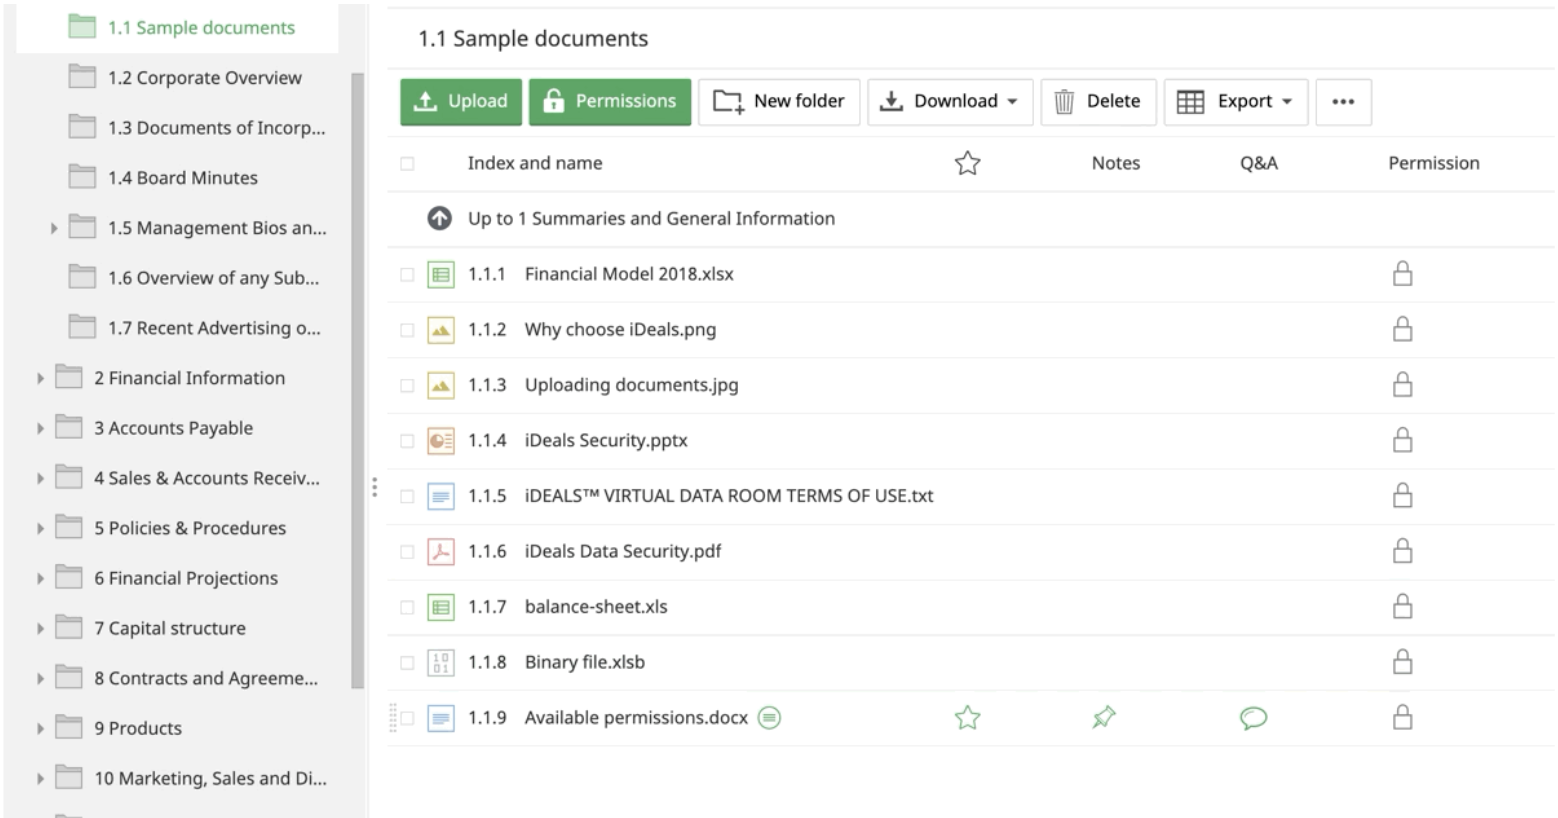
- Define the structure. Before you start uploading documents, define the structure of the VDR. This includes creating a file and folder structure and naming conventions that are intuitive and easy to understand.
For example, you might create parent folders based on topics such as Financials, Legal, and Operations and then create subfolders within each of these categories based on further criteria, such as by year or document type. - Organize files. Organize the documents within the folder structure in a logical and consistent way.
For example, you might classify documents by year, legal documents by type (e.g., Policies and Procedures, Financial Projections, Capital Structure), and operational documents by business function (e.g., Sales, Marketing, etc.).
- Use descriptive file names. Use descriptive file structures that accurately reflect the content of all documents.
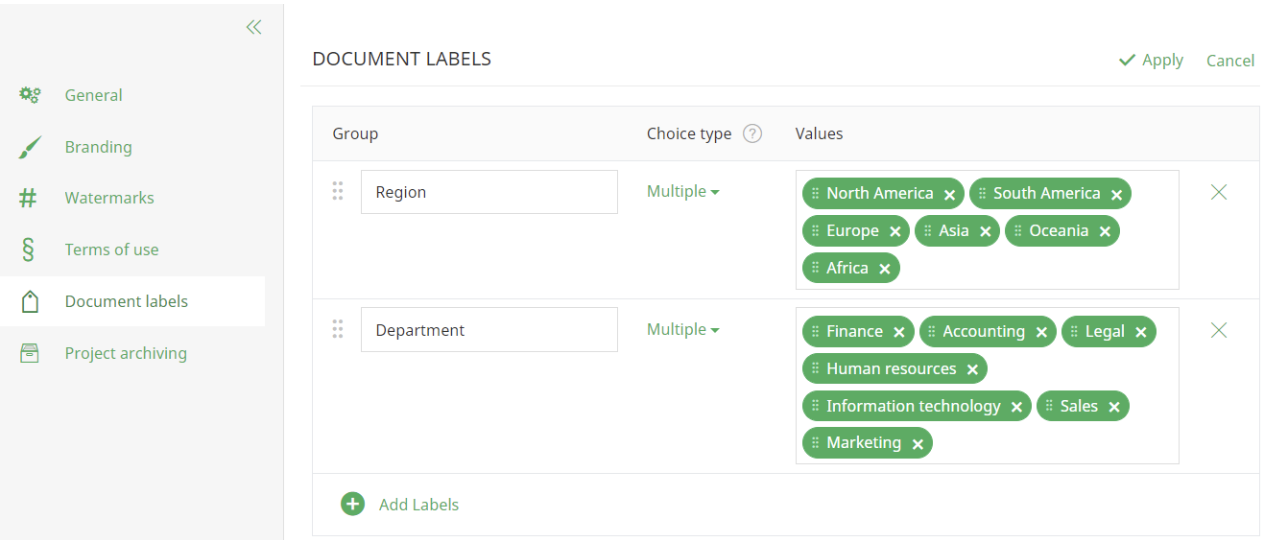
For example, you should avoid using generic file names such as “Document1” or “Untitled” as they can be confusing and make it difficult to classify files and find specific documents. - Use document labels. Use document labels or tags to create an additional navigation layer. Add additional information about each document, such as author, date created, and keywords.
For example, you can create folders based on a business function (e.g., Sales, Marketing), and document labels based on a specific category of information those documents relate to (Marketing Campaigns, Competitor Research, etc.).
Furthermore, you might restrict access to financial documents to only those users who need to see them, while allowing all users to access operational documents. - Provide a clear navigation menu. Provide a clear navigation menu that allows users to easily navigate through the folder structure and find the documents they need. Make sure a data room offers a full-text search function to make it even easier to find specific documents.
Prepare the data for uploading
Preparing documents for use in a virtual data room (VDR) requires careful attention to detail to ensure that they are easy to locate, navigate, and understand for all users. Here are the basic steps for working with documents in a VDR:
- Use consistent naming conventions. Use consistent and descriptive naming conventions for all documents within the VDR. This makes it easier to locate and understand documents.
For example, you might rename files based on the date, title, and author of the document, such as “2023-04-11_Marketing_Plan_Smith.pdf”. - Use standard file formats. Use regular file types that can be easily opened and viewed by all users. Most data room providers support PDF, Microsoft Word, or Excel files. Make sure you avoid using proprietary file types that require special integrations to access.
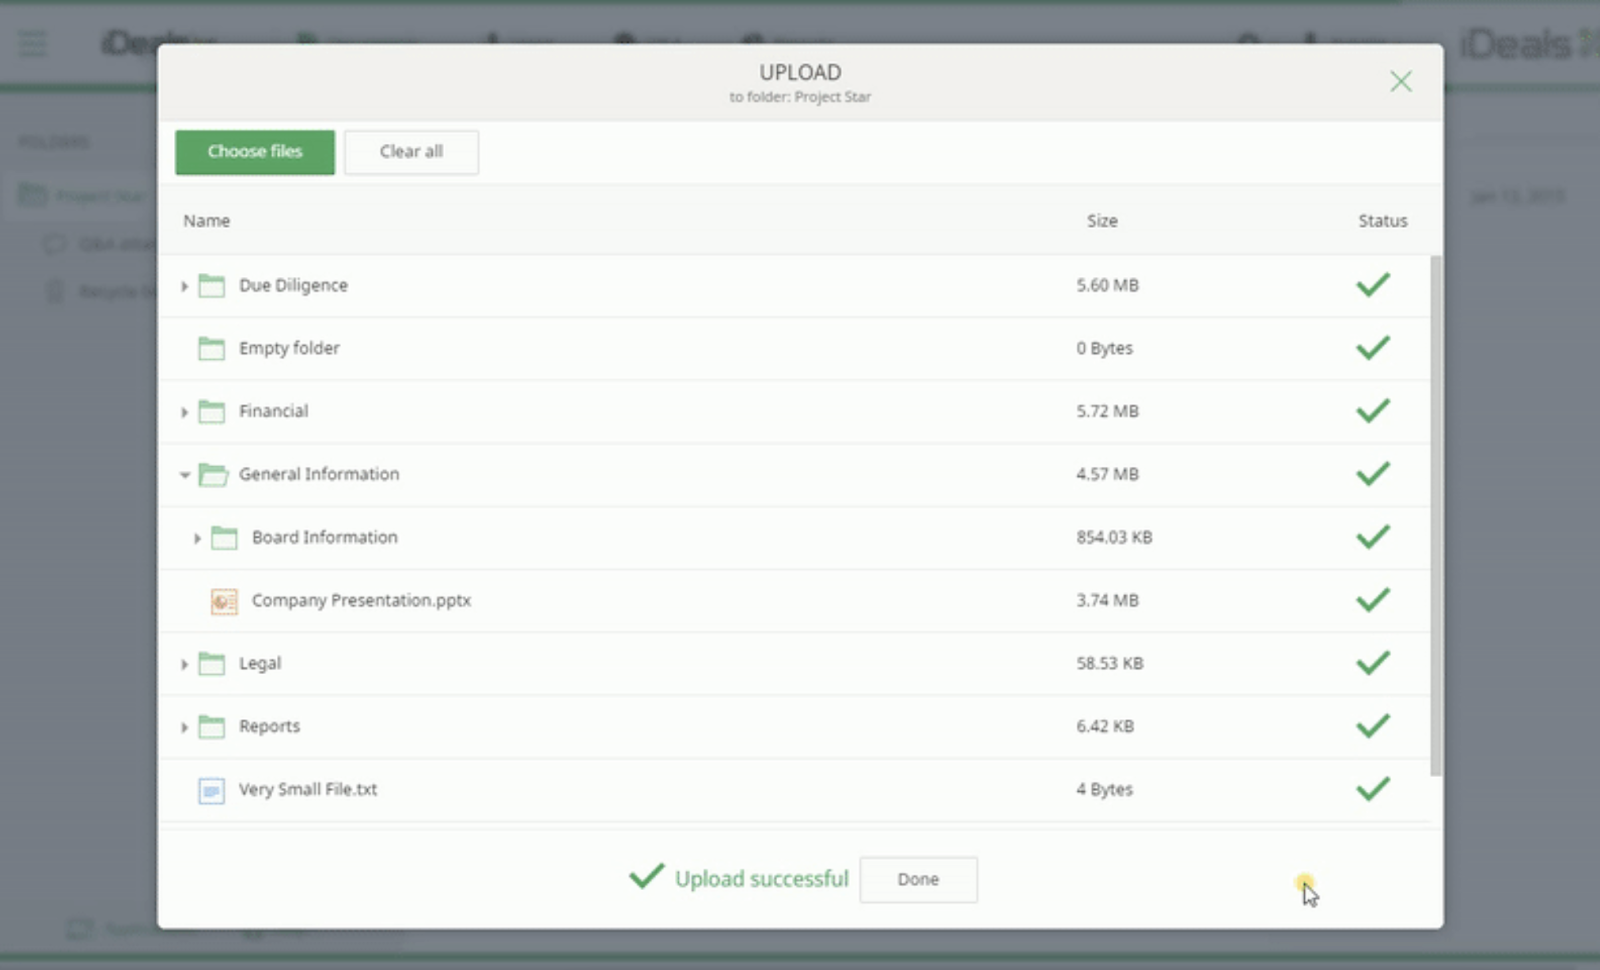
- Add documents via drag-and-drop. Now you can upload all files using a bulk upload or a drag-n-drop upload tool. If you upload files multiple times, you can track their uploading statuses via dedicated progress bars.

- Use document indexing. Use document auto-indexing to make it easier to arrange documents in hierarchical groups of folders and subfolders. This can be especially helpful for folders containing larger text-based documents such as contracts or legal agreements.
Set permissions strategically
Once all documents are uploaded, you can set permissions strategically for specific user groups.
- Define administrators. Though the administrator’s account setup was already described in the first step, it is important to have full and restricted administrators for diversifying responsibilities. Full administrators have unlimited data room access, and the ability to assign roles and permissions, monitor activity, and make any changes to the data room. Restricted administrators usually can only view documents and user groups they administer. Define the people who will perform these functions and give them proper levels of data room access.
- Create user accounts. At this stage, administrators can create user groups for all individuals who will have access to the VDR. This could include internal employees, internal stakeholders, external advisors, and potential investors.
- Assign permission settings to user accounts. Set permissions to group members based on their role and level of access needed within the VDR. You can also set up some individual user permissions or special access controls for specific files and folders. This can be done using the VDR file permissions tab.
Now, let’s take a quick look at the common permissions that many data room services offer. Most of these can be set up on a group level.
| None | Users with this access level won’t be able to see any folder or file listed in the data room. |
| View | Users with this access level can view files with watermarks in a browser. They can enable or disable the fence view feature, which is useful for working in public or crowded locations. |
| Users with this access level can print documents in addition to viewing them with watermarks. | |
| Download | Users with this access level can download original unwatermarked files in their native format. This access level may or may not include password protection or digital watermarks. However, most providers allow tracking the downloading events. |
| Upload | This access level is intended for user groups responsible for uploading data to specific folders without full administrative rights. This access level includes all the features mentioned above. |
Send invitations to the users
The final step of setting up a virtual data room (VDR) is inviting users to access the VDR and assigning appropriate access restrictions to each user. Here are the steps to follow:
- Invite users. Invite users to access the VDR by sending them an email with login credentials and access instructions. You can also send invitations to predefined user groups or to individual users.
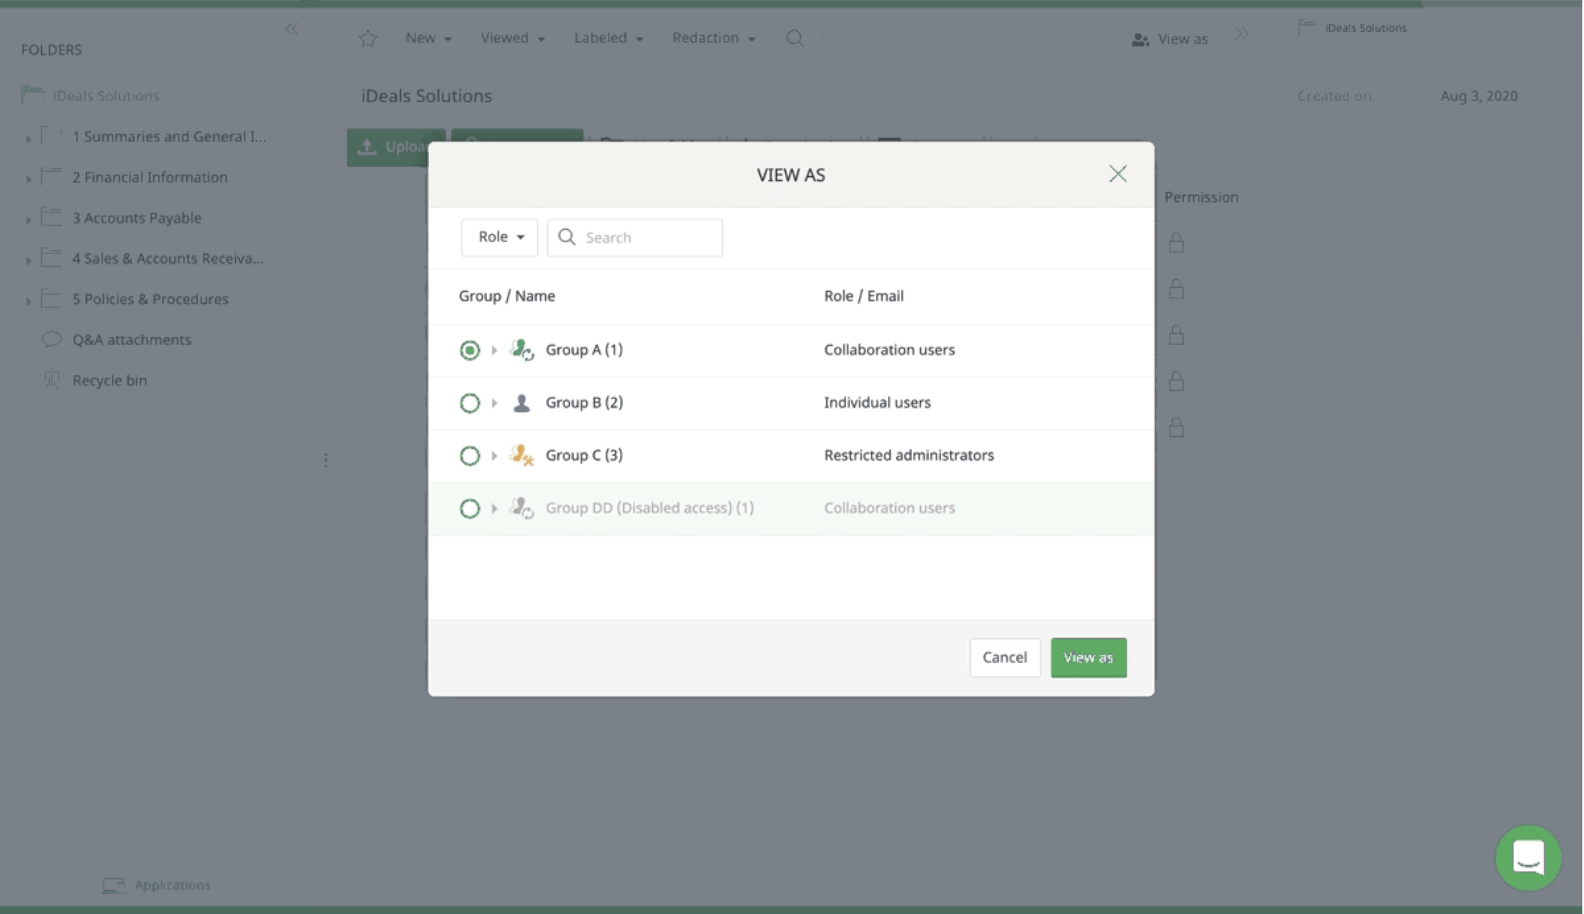
- Rely on the View-As function to double-check permissions. Before sharing any documents with user groups or individual users, make sure you double-check all levels of access using the “View As other users” feature.

- Monitor activity. Once all permissions are defined, you should monitor activity within the VDR to ensure that all users have proper access levels and use the data room effectively. This process includes monitoring logins, interactions with the data room, downloads, and uploads.
Conclusion
Setting up a virtual data room is a quick and intuitive process that requires thoughtful preparation.
To initiate the process, you should define your data room administrator and prepare NDA agreements for data room access. Then you should create an admin account, define the desired data room structure, and prepare all the documents for uploading.
Once that is done, you can create groups with restricted permissions and send out invitations to data room members.
Consider using assistance from a dedicated data room expert to make sure you set up your data room properly.